You have made the decision. Now you want to know exactly how to do it right.
Installing artificial grass is one of the most rewarding backyard upgrades a homeowner can make. According to the U.S. Bureau of Labor Statistics’ American Time Use Survey, roughly one in ten Americans spends time on lawn and garden care on any given day, averaging over two hours per session.
A properly installed artificial lawn gives you that time back permanently. The emphasis is on properly. Every step in this process builds on the one before it, and the steps that occur underground determine everything you see above ground.
Follow this guide, and you will know exactly what a quality installation looks like from start to finish.
What You Need Before You Begin
Before any work starts, take accurate measurements of the area and add ten percent for cuts and waste. Gather your materials: crushed aggregate base, weed barrier fabric, turf nails or landscape staples, seam tape and adhesive for joining panels, infill material, and a push broom.
A plate compactor is non-negotiable for proper base work. A box cutter and straight edge will handle all your turf cuts.
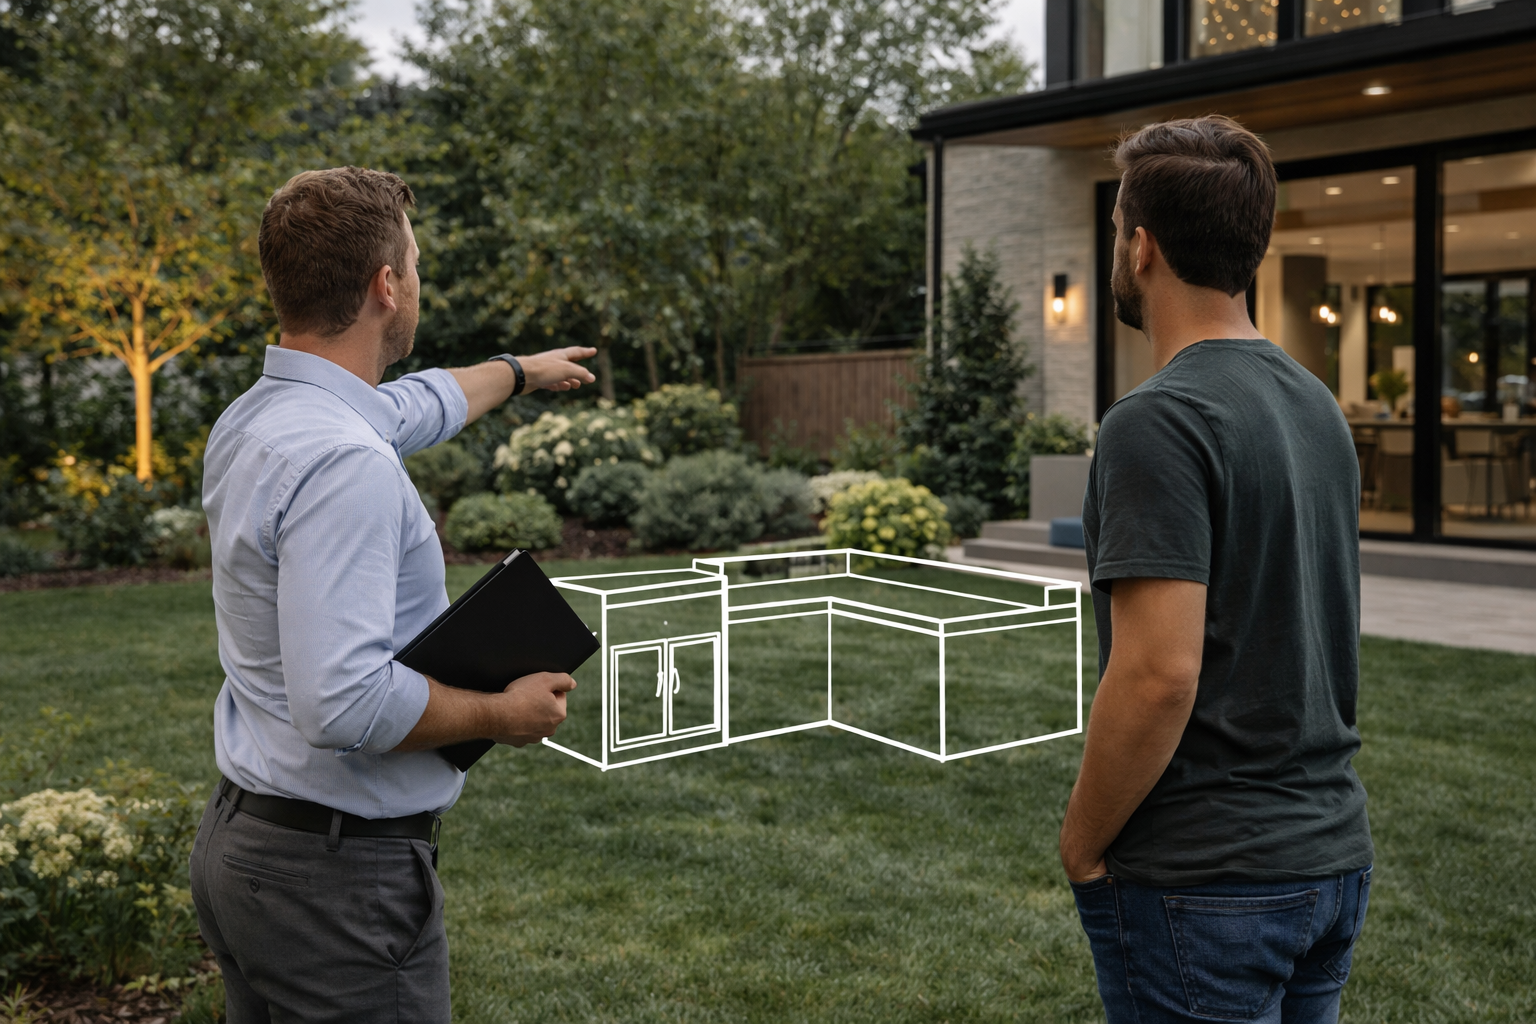
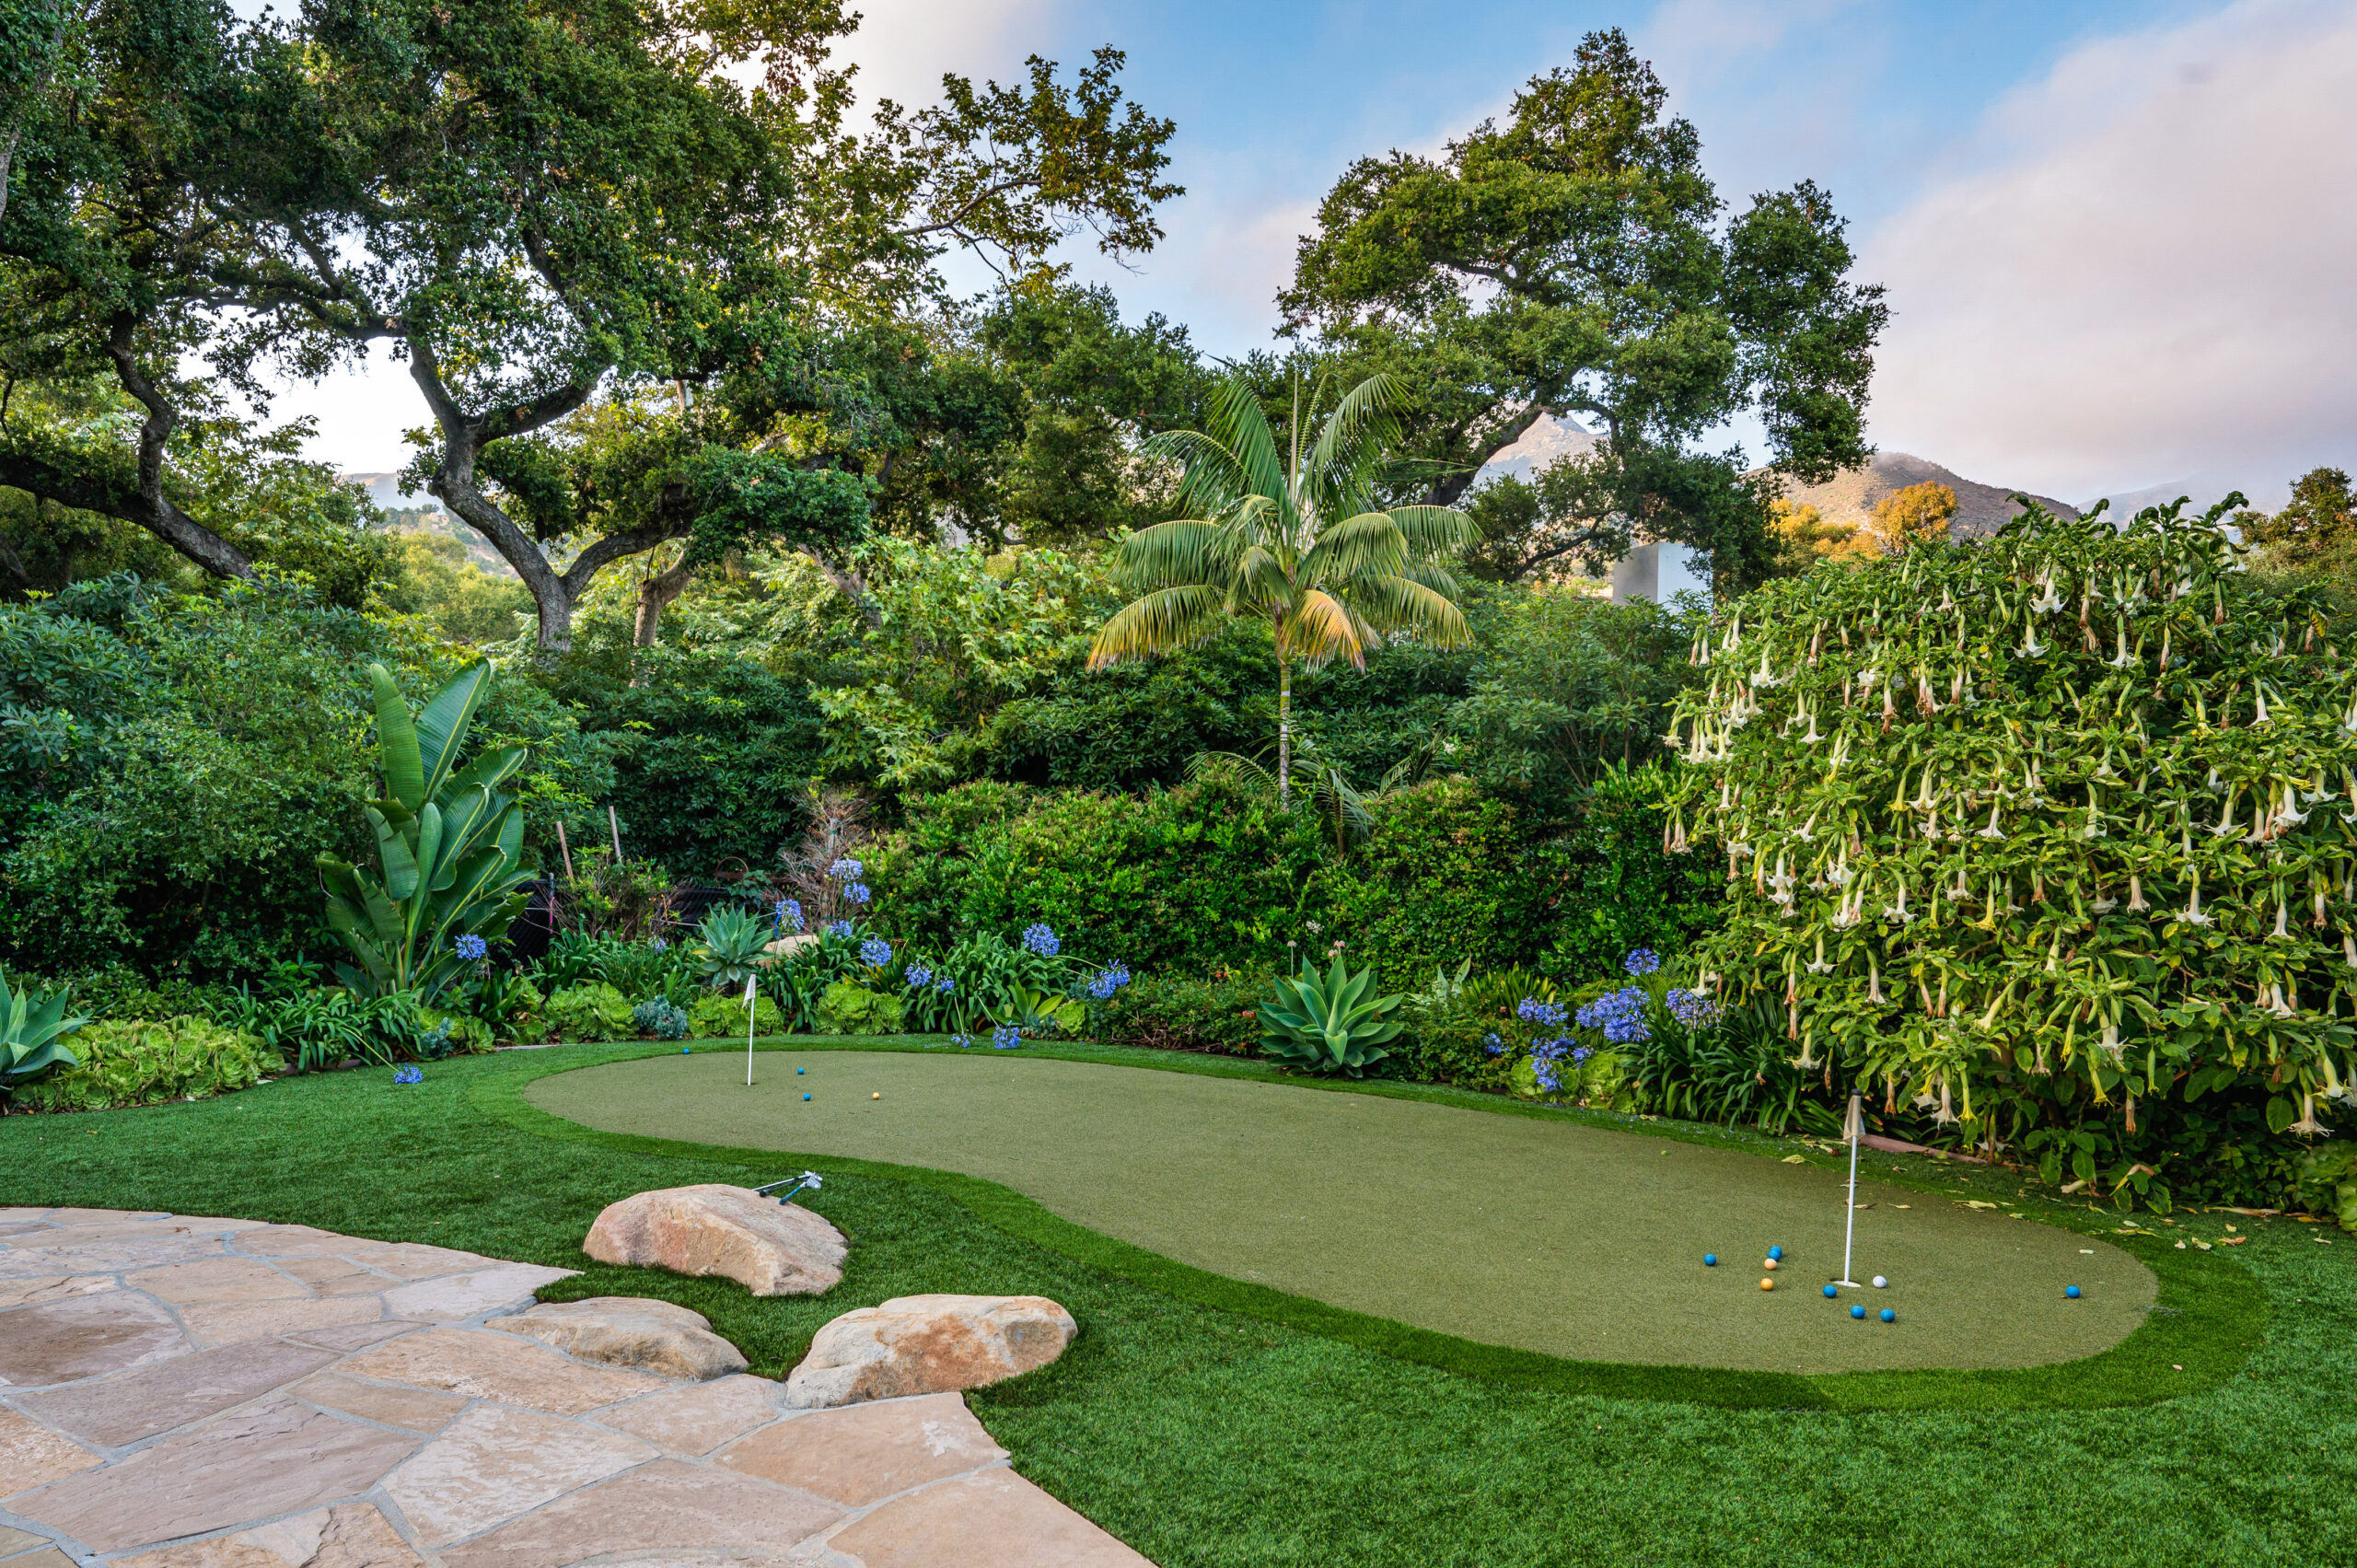
Also, think through your turf choice before you order. A putting green needs a specialized surface with specific roll characteristics. A rooftop or balcony application calls for lightweight backing with strong drainage performance.
A family backyard with kids and pets has different pile and backing requirements than a decorative front yard. Matching the right product to the right application from the start saves significant time and money later.
Step 1: Remove Existing Vegetation and Excavate
Clear the entire area of grass, weeds, roots, and organic debris down to bare soil. Do not skip this step or work around it. Organic material left beneath synthetic turf decomposes over time, creating soft spots, uneven surfaces, and drainage failures that are expensive to correct after the fact.
Excavate to a depth of three to four inches for standard residential installations. In high-traffic areas, or anywhere the turf will integrate with pavers or hardscape, going deeper gives you a more stable platform. Your goal is a clean, flat subgrade that gives the base layer something solid to sit on.
One note specific to Naperville and the broader Chicago area: the soil here tends to be dense and clay-heavy. Clay limits natural drainage, which makes thorough excavation and a well-built base even more important to prevent water from pooling after heavy rain in Illinois.
Step 2: Build and Compact the Base Layer
This is the most technically critical step in the entire process. Everything visible depends on getting this right.
Spread crushed aggregate, typically decomposed granite or crushed stone, evenly across the excavated area. Work in two-inch layers, compacting each one with a plate compactor before adding the next. Keep checking the level as you go.
The finished base should sit approximately one inch below the surrounding edging or hardscape, leaving room for the turf and infill above it.
Proper compaction is where most DIY installations fall short. Without it, the base settles unevenly over time. You end up with dips, ripples, and drainage issues that cannot be fixed without pulling the turf back up and starting over. Take the time to do it right here, and every step that follows goes smoothly.
Step 3: Install the Weed Barrier
With the compacted base in place, roll out a permeable weed barrier fabric across the entire surface. This layer blocks weeds from pushing up through the base into the turf backing while still allowing water to pass through freely.
Overlap the seams by at least six inches and secure the fabric with landscape staples. Trim the edges clean at the perimeter.
The barrier should lie completely flat before you move on. Any wrinkles or lifted areas will show through the finished surface.
Use permeable fabric, not solid plastic sheeting. Solid sheeting blocks drainage and traps heat beneath the turf, both of which shorten the installation’s lifespan and cause performance problems over time.
Step 4: Cut and Position the Turf
Unroll your turf and let it sit for at least an hour before cutting. This matters especially in the Chicago area, where temperature swings are significant. Turf cut cold and then warmed by the sun can expand slightly, causing bunching or misalignment at seams.
Position every panel so the pile runs in the same direction. Artificial grass has a grain. Panels installed in opposing directions will look noticeably mismatched even from a distance. Lay each section carefully, check that the pile direction is consistent, and leave two to three inches of overlap at the edges for trimming.
Cut from the backing side with a box cutter and a straightedge. Take your time around curves, corners, trees, and any area where the turf meets a hard edge. Precision cuts here directly determine how clean the finished installation looks.
Step 5: Secure the Edges and Seams
Starting at one edge, drive galvanized nails or landscape staples every four to six inches along the entire perimeter. Pull the turf taut as you work. Any slack left in the surface will eventually show as a wrinkle or wave.
For seams where two panels meet, cut both edges cleanly so there is no overlap or gap. Lay seam tape beneath the joint, apply turf adhesive, and press both edges firmly down onto the tape. Roll the seam flat and brush the pile away from the joint in both directions to blend the grass blades across it.
A well-executed seam is virtually invisible. A poor one is the most obvious sign of a rushed installation, and it cannot be corrected once infill is in place. If you are unsure about seam work, this is the point in the process where professional execution pays for itself most clearly.
Step 6: Apply Infill and Brush the Surface
Infill is the material spread across the turf to support the grass blades upright, add weight to keep the surface anchored, and enhance the feel underfoot. Common options include silica sand, antimicrobial rubber, and organic blends. The right choice depends on your use case.
Pet areas benefit from antimicrobial options. High-use family lawns need heavier infill for durability. Areas with significant sun exposure benefit from infill types designed to reduce surface heat.
Use a drop spreader to distribute the infill evenly, then work it into the fibers with a stiff push broom, brushing against the grain so the blades stand upright. Work the entire surface until the infill is fully integrated and the grass looks full and natural.
This step also matters for Chicagoland summers. Unshaded synthetic turf can heat up on hot days, and the right infill selection helps manage surface temperature for comfortable use.
Step 7: Inspect, Test, and Finish
Walk the entire installation and check for anything that needs attention: edges that need trimming, seams that need additional pressure, low spots that need infill adjustment, or any area where the surface is not lying completely flat.
Run a hose across the surface and watch the drainage. Water should flow freely through the backing and disperse through the base without pooling anywhere. If you see standing water, investigate before calling the project complete.
Give the turf a final thorough brushing to lift the pile and bring out the finished appearance. Remove any loose infill from surrounding surfaces. Stand back and look across the surface from a low angle to catch any inconsistencies in the pile direction or infill distribution.
That is your installation. Maintenance from here is minimal: a periodic rinse, occasional brushing in high-traffic spots, and clearing debris after Naperville’s fall storms or heavy winter snowmelt.
When to Call a Professional Installer
This guide gives you a complete picture of what a proper installation involves. It also makes clear how many steps have compounding consequences if they are not executed correctly.
Base compaction that is slightly off creates drainage problems. Seems a fraction misaligned becomes visible over time. Turf positioned without accounting for grain direction produces a mismatched finish. These are the most common reasons homeowners end up having to redo installations entirely.
A professional brings the right equipment, material knowledge, and hands-on experience to each stage. That matters even more when the project involves integrating artificial grass with hardscaping and pavers, incorporating it into a full backyard renovation, or navigating the drainage demands of Chicago-area clay soil and freeze-thaw cycles.
Luxterra Outdoors: Artificial Turf Installation Across Naperville and the Chicago Suburbs
Luxterra Outdoors is a premier landscape design-build company serving Naperville and the greater Chicago area with over 35 years of combined team experience. Our Techo-Pro-certified installers handle every stage of artificial turf installation, from site prep through final brushing, covering pet-friendly backyard lawns, putting greens, rooftop applications, and full outdoor living projects.
Every project includes a custom 3D design plan, so you see the finished result before a single shovel breaks ground.
Ready to Get Your Artificial Grass Project Started?
Whether you are planning a backyard turf lawn in Naperville, a play area in Hinsdale, a low-maintenance front yard in Elmhurst, or a full outdoor transformation anywhere across the Chicago suburbs, our team is ready to help. Schedule your free consultation, and we will put together a custom plan built for your space.